
These DIY Shelves REALLY STAND OUT! Plus, we share our favorite maker videos! Maker Break S1E40
This week my wife asked me to try making these crazy geometric shelves! Plus we share a few of our favorite Maker Videos of the week!
Project of The Week!
This, is what my wife sent me earlier this week. Cool shelves for sure. And they look super simple right?
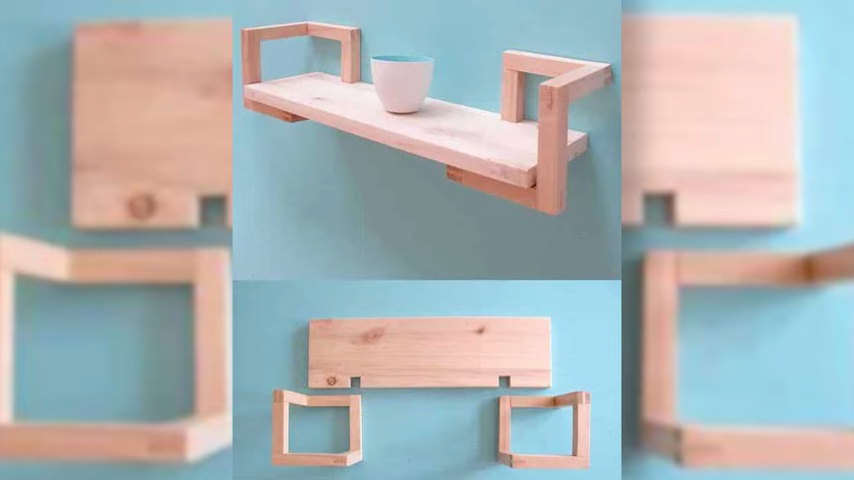
Well, to make sure those supports can, you know, support the shelf, it looks like they used bridal joints. So I tried that, using a handsaw, and uh, this is how the test piece came out. Not great. Not terrible, but not great. I built a full support and it was just, ugly. Too may imperfect joints.
My wife wanted me to paint the supports black, so I knew the joints wouldn’t show. So to simplify this a bit, I decided to go with half laps.
To determine how long to make my support pieces, I first needed to know how deep the shelves would be. In this case they’d be 7 and ¼”. I had a few pieces left over from my wife’s bookshelf, and I used those as a template to cut a third.
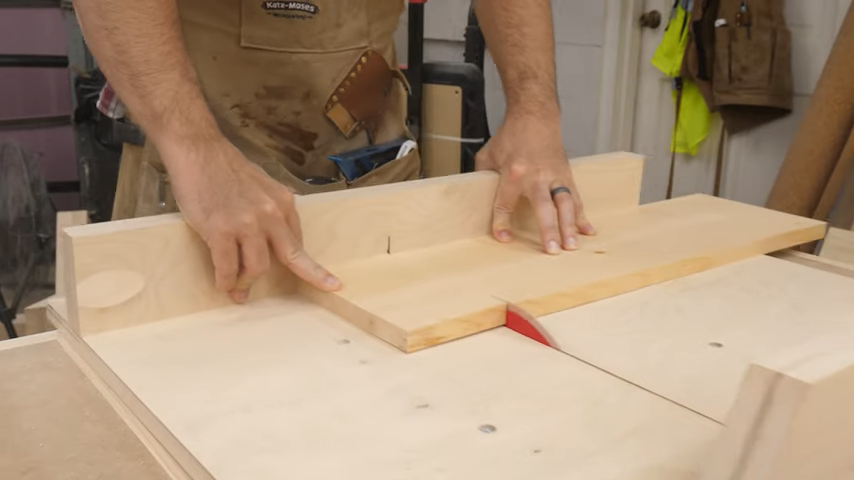
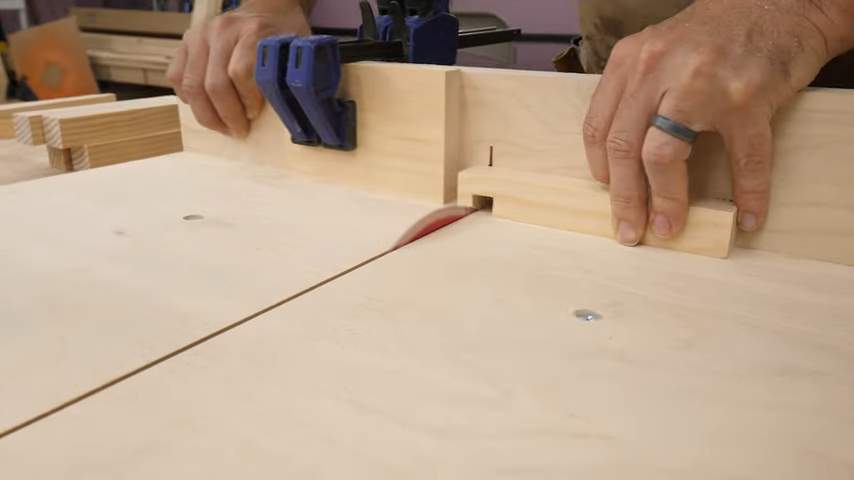
Next I used my sled to trim them to length.
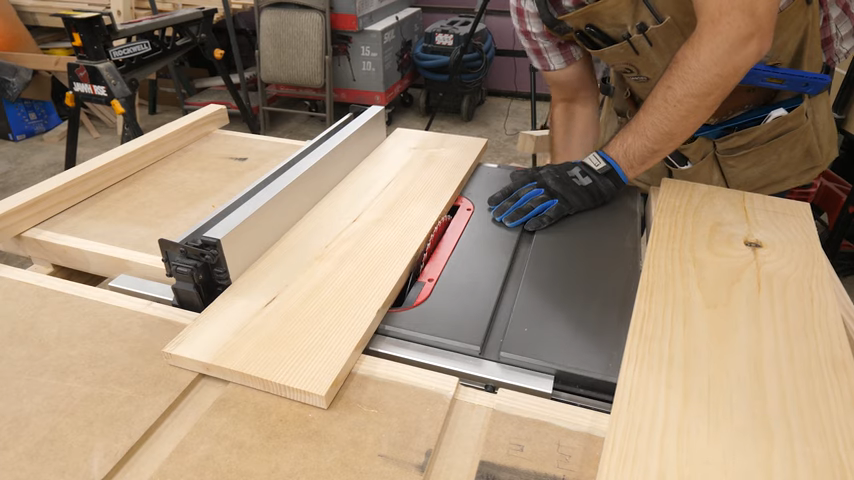
Next I needed to make the 1in square pieces that would make up the supports. I only had 2x2s so I cut them down on the table saw.

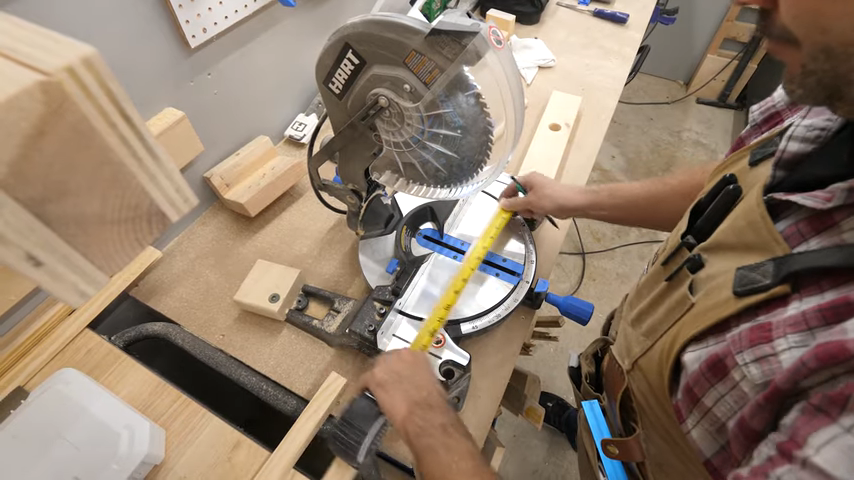
Once it was exactly 1” x 1”, I went back to the shelves to figure out how long my support pieces should be. I wanted the shelf to stick out a bit from the supports up front, so I decided to make them 6.5” each. I took it over to the mitersaw, setup a stop block, and cut all my pieces.
I was going to need 6 for each support, and made just enough for 1 shelf. I wanted to be sure this worked before I made the other two.
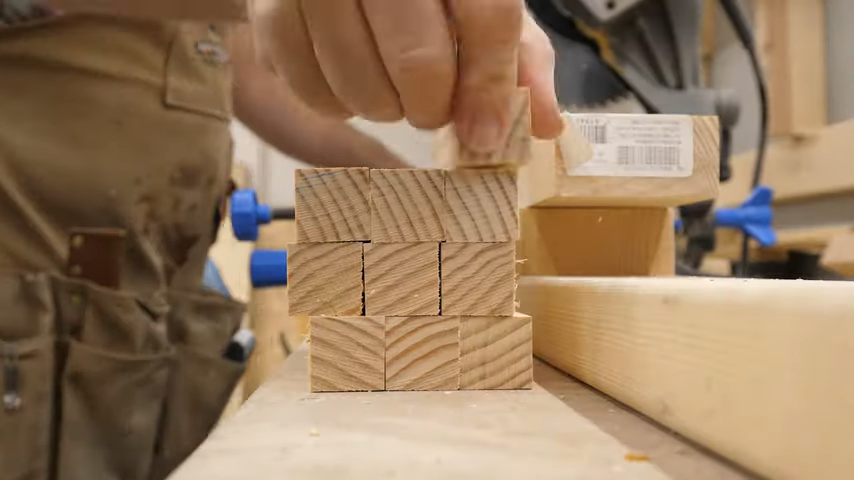
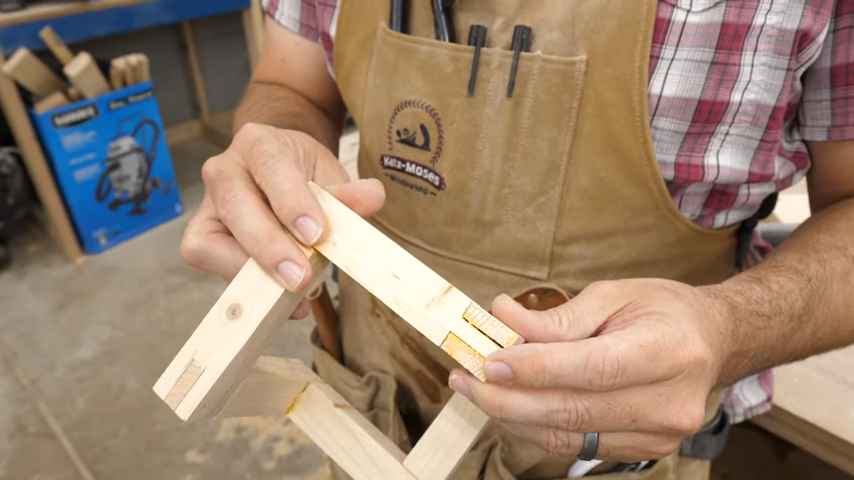
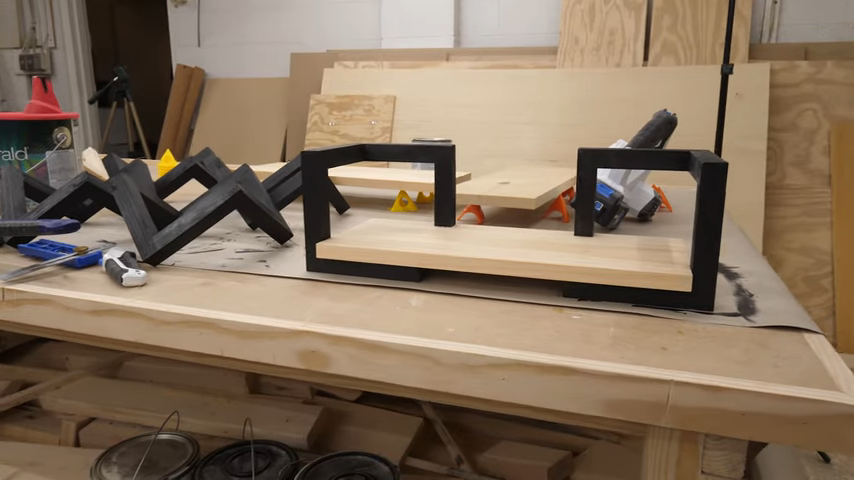
Once I had all 12 pieces ready, I had to figure out how these half laps would work. I realized that I could make 5 of the pieces exactly the same, as long as I flipped the last cut on the 6th one. You’ll have to trust me here, but that’s how the math worked out.
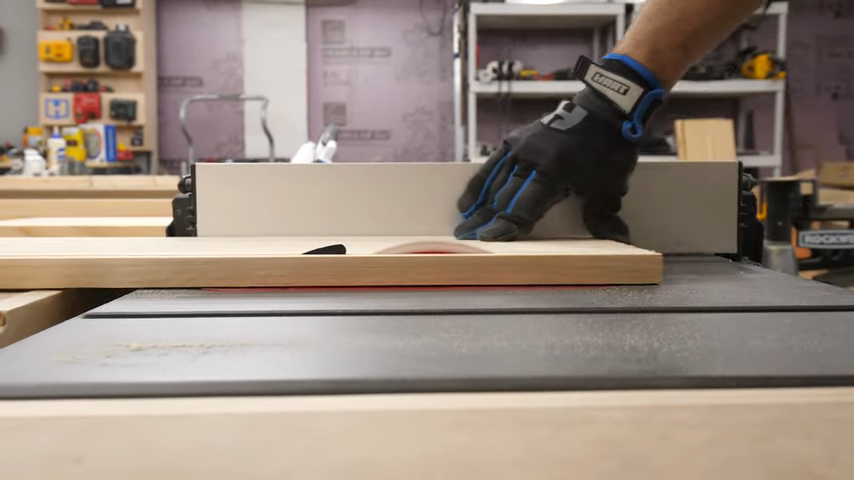
To cut all these half laps, Sarah suggested I use our sled to cut them out. So we tried a few test pieces and they fit great! So that’s what I did.
I clamped on a stop block to limit how deep I could cut, and then carefully adjusted the height of the blade to cut away exactly half of the wood. I wasn’t thrilled with how close my fingers were getting to the blade, but I had 10 when I was done.
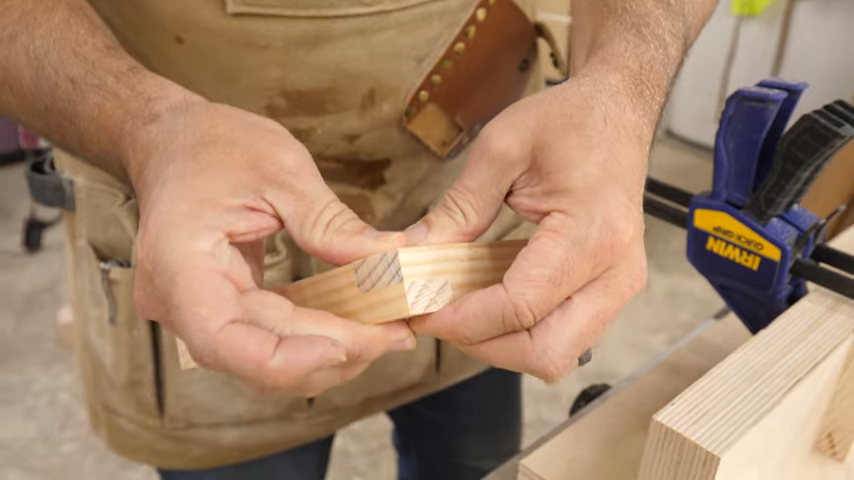
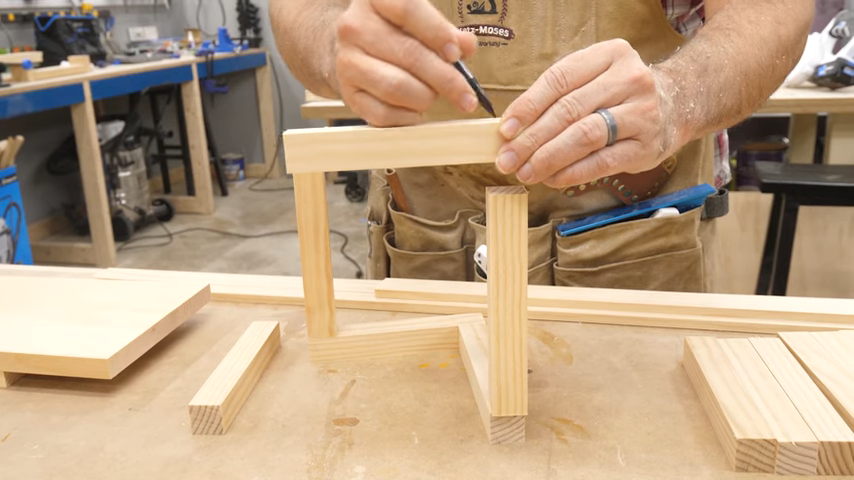
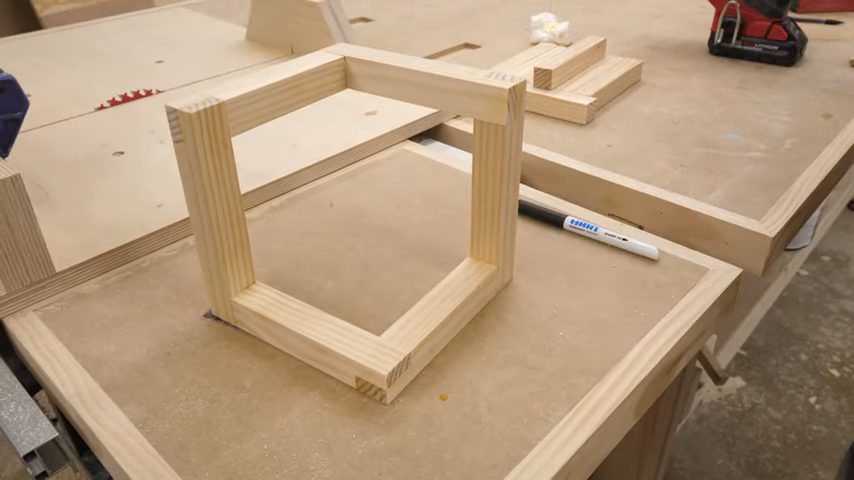
And look at that joint! So satisfying. I mocked up the pieces and they fit great. And as you could see, just the last one had to be cut differently on one end, and that made the whole thing work.
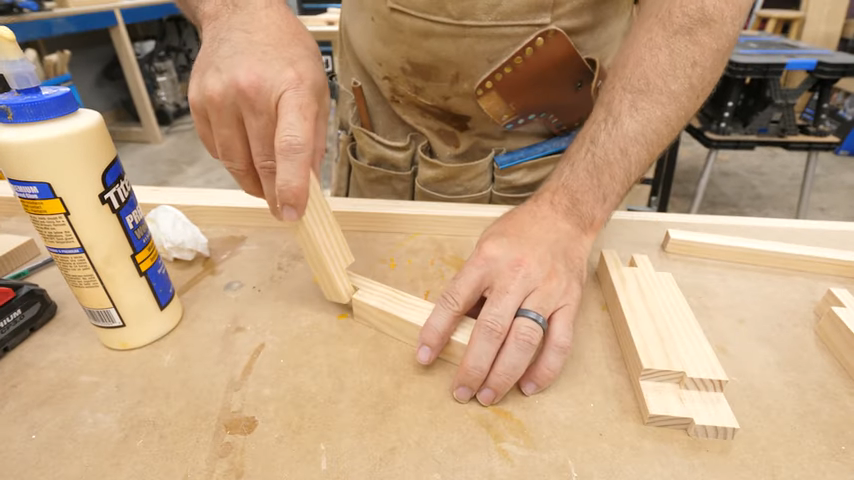
To hold these together, I used these two. Titebond II and my trusty brad nailer. The Glue would do the real work, while the brad nails held it in place while it dried.
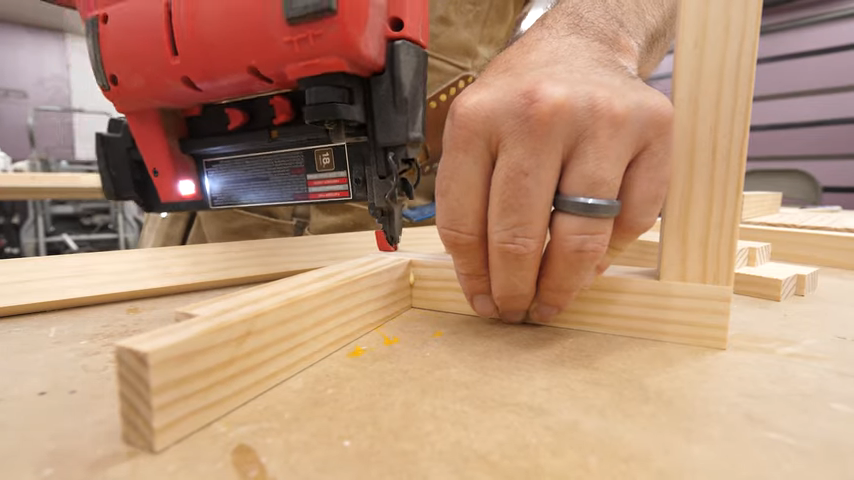
I glued up each joint, pressed them together, and popped in a couple nails. Easy.
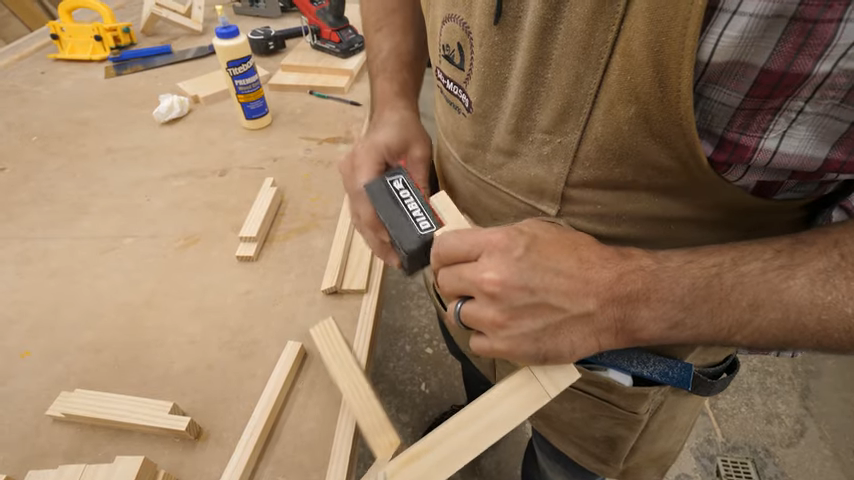
Some of the jointed needed a little sanding. When they did, I just grabbed my handy sanding block, and smoothed it over till it fit.
And there you have it! The joints are all tight, and strong. Now I just had to make 5 more. I let the glue dry over night, and then headed back in to paint and finish.
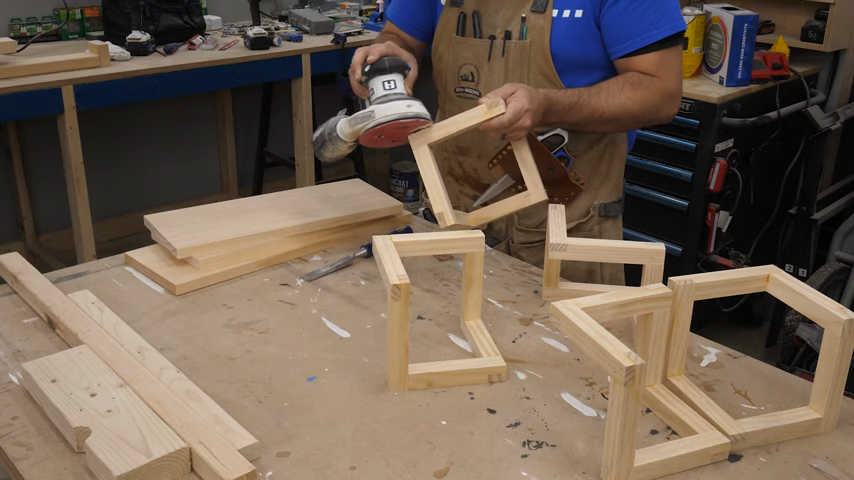
First I sanded each piece and chipped off any excess glue. I pulled out some paper to protect the table, got my pieces ready to paint. For the shelves I just used a water based poly, and the supports were painted black.
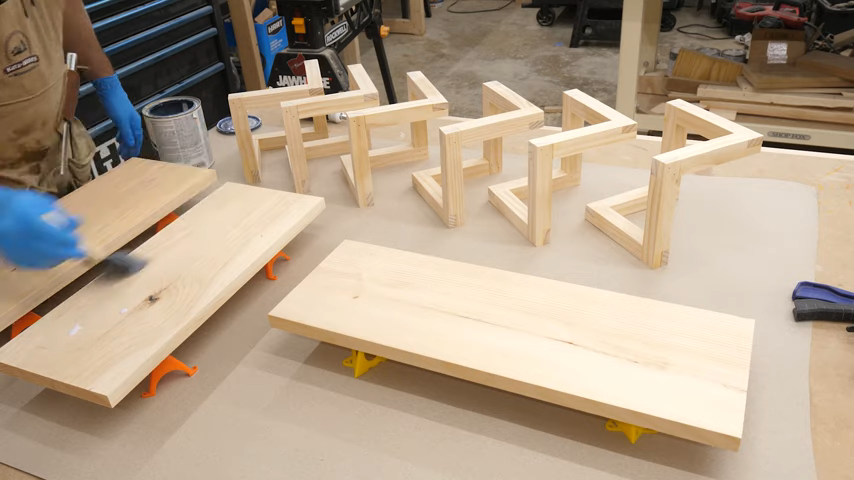
When they all dried, I remembered to cut out the notch in each shelf, nailed them together, and hung them up for my wife.
And there ya go. Once again, not a design I would have picked, but my wife knows what’s she’s doing, and sure enough, they look great when paired up with the other projects I’ve done for the living room.
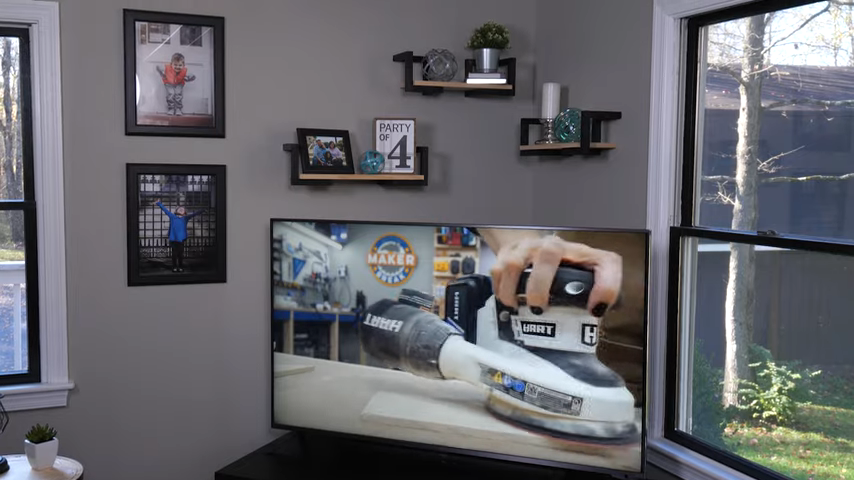
This project brought a lot of pain, but the reward was worth it.
Favorite Maker Videos of the Week!
First up, it’s almost Christmas! Over at LRN2DIY they’re getting a head start on Christmas, with permanent LED Christmas lights! This is NOT a cheap DIY project, but boy do I want to somehow fit this in my budget.
Mark Spagnuolo, the Wood Whisperer, shared a new product this week, called the Taper Maker, which is a jig for your table saw, to cut, well, tapers. But it was this last part that got my attention. YUP, it can be used in place of a jointer to flatten the edge of a board. As a guy without a jointer, SIGN ME UP. Mark has plans and a hardware kit for only $30, which I ordered. But I’m gonna have to figure out how to make the thing without several other high end tools I don’t have.
And last of all, Jay Bates built a set of adorable stairs… for his cat. Do I really need to further sell this video? Go watch it.
Hello, you used to write excellent, but the last few posts have been kinda boringK I miss your tremendous writings. Past several posts are just a bit out of track! come on!
What i do not understood is in fact how you’re not really much more smartly-appreciated than you might be now. You’re so intelligent. You already know therefore considerably in terms of this matter, produced me personally imagine it from so many numerous angles. Its like men and women aren’t fascinated unless it is something to accomplish with Lady gaga! Your personal stuffs excellent. At all times take care of it up!
I have been checking out some of your articles and i can state clever stuff. I will definitely bookmark your website.
Good ?V I should definitely pronounce, impressed with your web site. I had no trouble navigating through all the tabs and related information ended up being truly simple to do to access. I recently found what I hoped for before you know it at all. Quite unusual. Is likely to appreciate it for those who add forums or anything, website theme . a tones way for your customer to communicate. Nice task..
Nice post. I be taught something tougher on different blogs everyday. It is going to all the time be stimulating to read content from other writers and follow somewhat one thing from their store. I’d prefer to make use of some with the content material on my weblog whether or not you don’t mind. Natually I’ll give you a hyperlink in your web blog. Thanks for sharing.
You are a very intelligent individual!
I?¦ll immediately grab your rss as I can’t to find your email subscription hyperlink or newsletter service. Do you have any? Please let me recognise in order that I could subscribe. Thanks.
you are really a good webmaster. The website loading velocity is amazing. It kind of feels that you’re doing any distinctive trick. Also, The contents are masterpiece. you’ve done a great job in this topic!
Great remarkable things here. I am very glad to see your post. Thanks so much and i am having a look forward to contact you. Will you kindly drop me a mail?
Hmm is anyone else experiencing problems with the images on this blog loading? I’m trying to figure out if its a problem on my end or if it’s the blog. Any responses would be greatly appreciated.
I truly enjoy reading on this website, it has got good posts. “The living is a species of the dead and not a very attractive one.” by Friedrich Wilhelm Nietzsche.
Magnificent web site. A lot of useful information here. I’m sending it to some friends ans also sharing in delicious. And of course, thanks for your sweat!